VISUAL TEST RECORDER
Getting Started
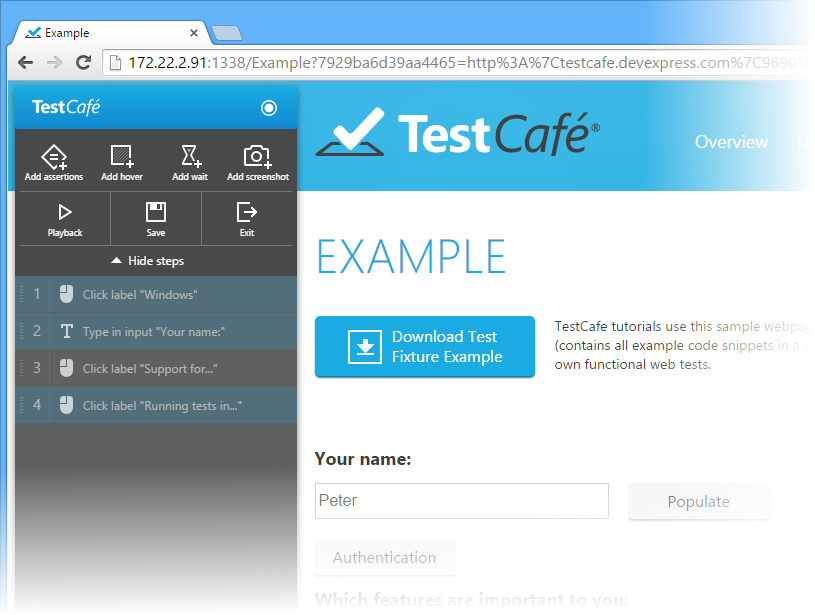
Once you clicked the Rec button, the Visual Test Recorder navigates you to the target website and logs all of your actions - from key presses to drag-and-drop operations. When the webpage is loaded for recording, the top left corner of the window contains the toolbar and a list of recorded steps, which allow you to quickly add user actions, save and playback the test, navigate through the recorded steps and modify them if needed.
After recording the appropriate action sequence, you can update your test in code (use the Edit Test Code topic) in order to add assertions or to modify your test if you don't want to record it again from scratch.
Toolbar
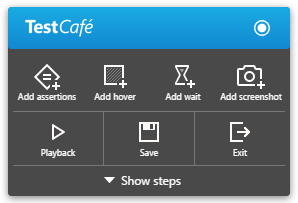
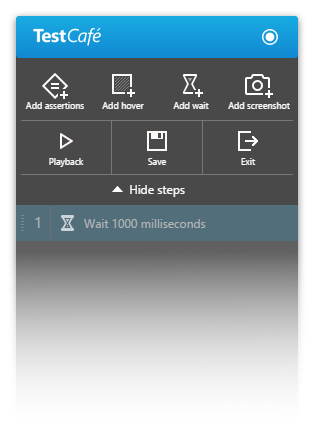
TestCafe's toolbar allows you to add user actions to a test, save and playback the test, and review recorded steps. If the TestCafe toolbar obscures important website elements, you can freely drag it to any position within the browser window.
Each recorded user action is automatically added to the list of recorded steps. To make the toolbar more compact, you can hide or show a list of recorded steps.
Recorded Steps
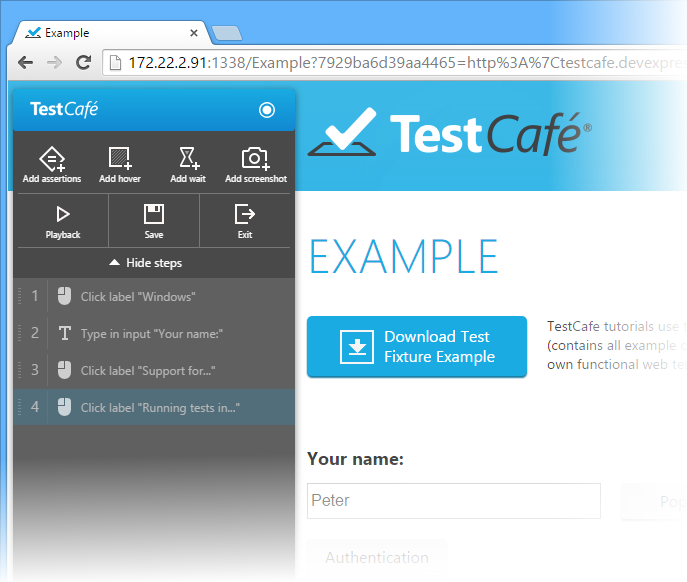
Each time a step has been recorded, it appears within the list of recorded steps and gets the selection. At this time, you can modify its options, swap it with other steps or delete this step if it was incorrectly recorded.
Each step in the list has an ordinal number, specific icon (that corresponds with the type of user action) and an automatically generated step name.
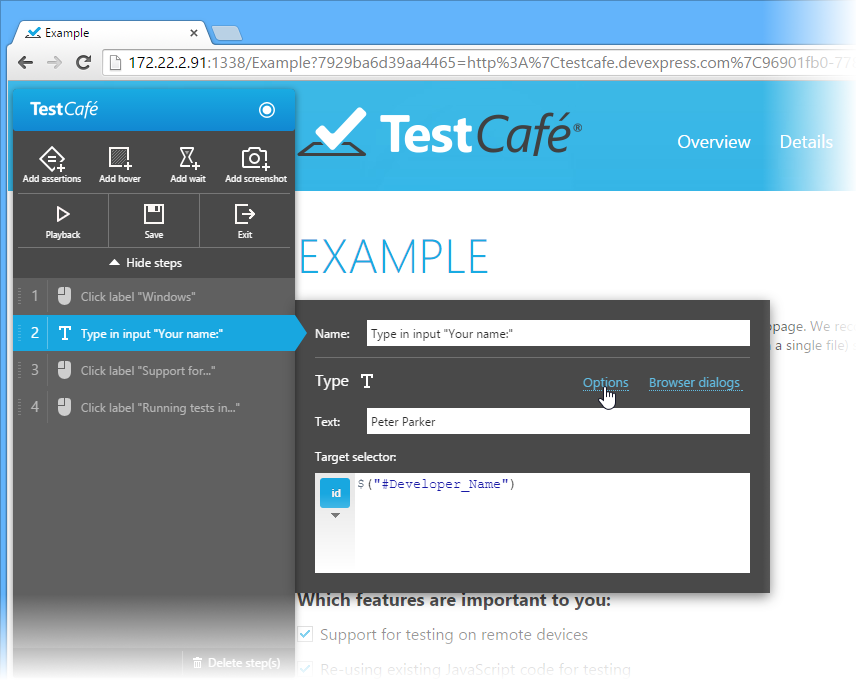
You can review and modify each step at any time while a test is recording. Click the step to open a dialog window, which allows you to modify the step options. Depending on the action type, you are allowed to modify the step name, element selector expression and other step parameters. Click Options to modify additional options like caret position, offsets and others. Use Browser dialogs to handle browser's native dialogs. The changes are saved automatically once you exit the dialog.
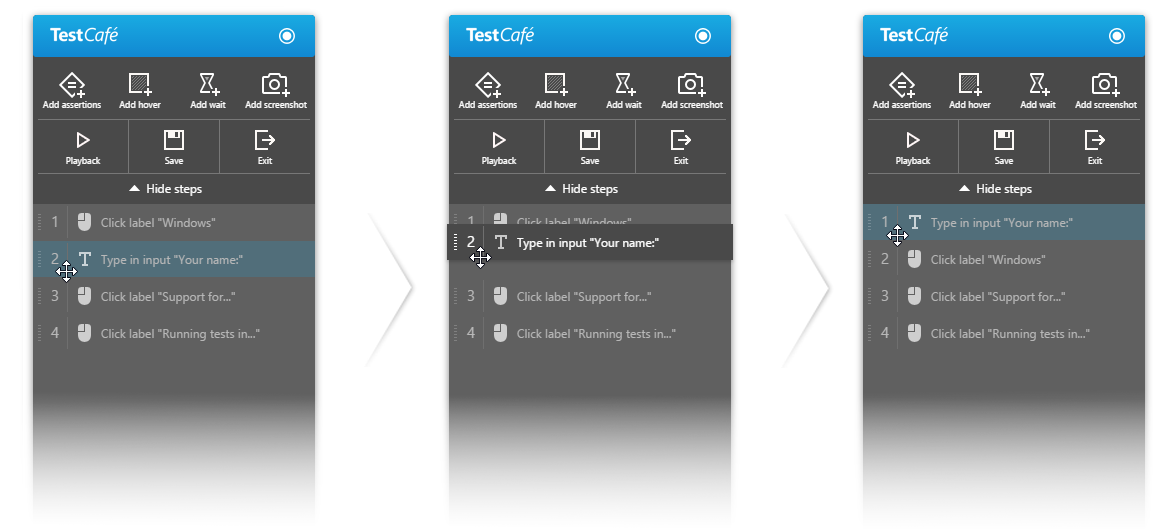
To swap steps within the list, drag the step and then drop it in the required position. TestCafe will automatically update ordinal numbers of steps within the list.
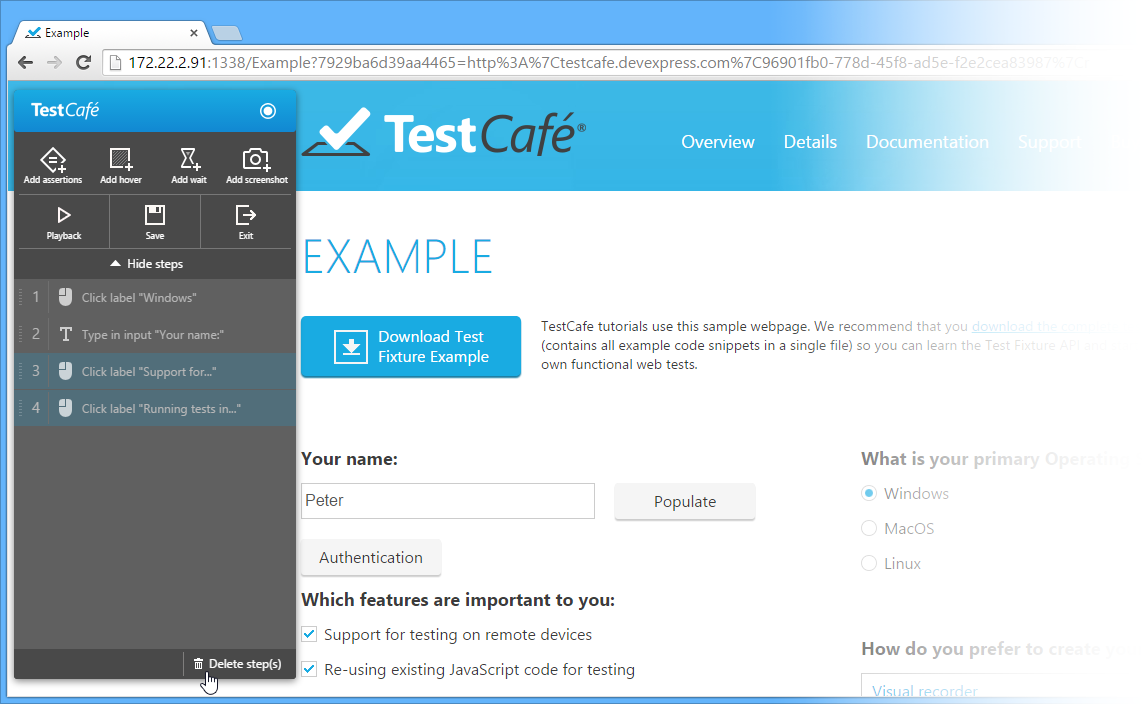
You can select one or several steps in the list at a time. A single mouse click selects a step and opens a dialog window. To select a step without opening a dialog window, use Ctrl+Click. While the Ctrl key is pressed, you can add one or several steps to the selection. To select a consecutive group of steps, click the first step, press and hold down the Shift key, and then click the last step.
TestCafe allows you to delete individual steps or a group of steps by using the Delete Step button. To delete steps, select them as shown above and click the Delete Step button. TestCafe will automatically update step ordinal numbers.
Hover Action
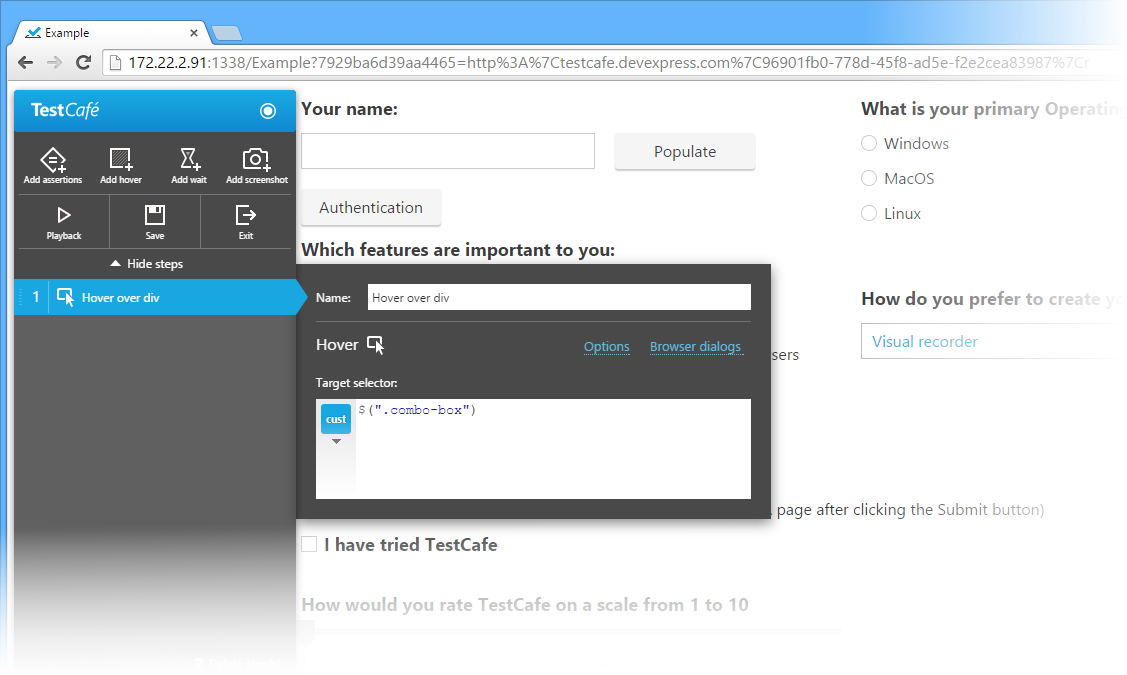
To record the hover action, click the  button within the toolbar. Then, hover the mouse over the required element on the page and click it. Available elements become outlined with a blue line when hovered. You can click the Esc key to cancel the hover action.
As a result, the hover action will be added to the list of recorded steps.
Tip
See also the act.hover user action.
Assertions
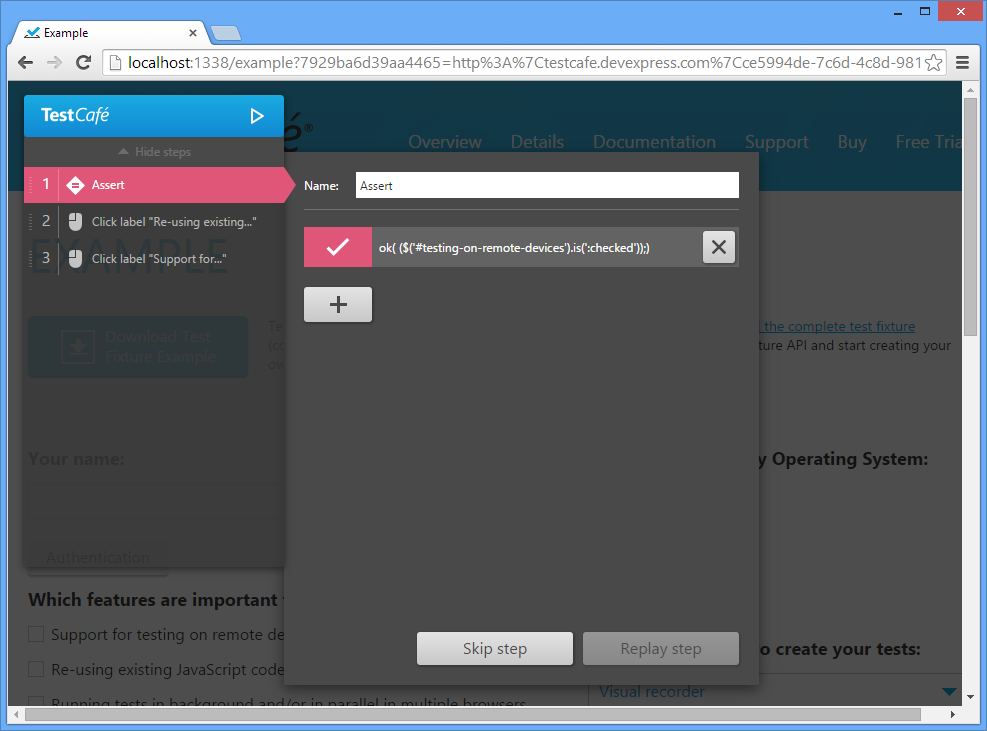
To record a step that contains one or more assertions, click the  button. Within the opened dialog, specify the step name and select the required type of assertion. TestCafe allows you to add assertions that will check whether an arbitrary expression resolves to true or false, and whether two objects are the same or different (use the Assertions section).
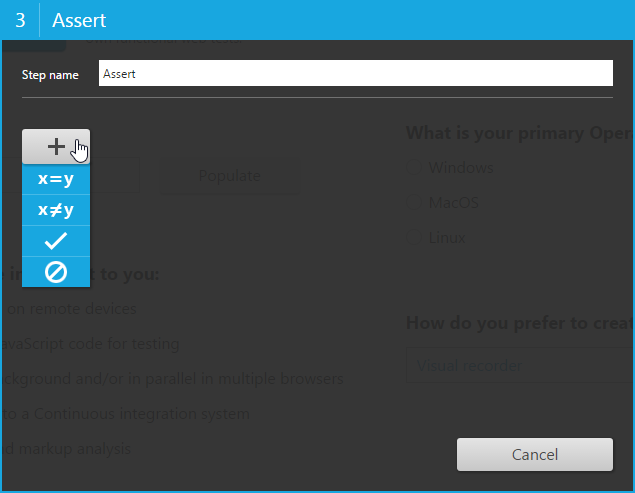
A text box at the top of an opened dialog window allows you to enter an assertion name that will later be reflected in the list of the step's assertions or shown within the TestCafe's Control Panel if a test will fail on a step that contains that assertion. Depending on the assertion type, you will be asked to specify the Actual and Expected expressions for the eq and notEq assertions, or to fill up the Expression field for the ok and notOk assertions respectively. Values of expressions are displayed within read-only fields that are located below expression fields.
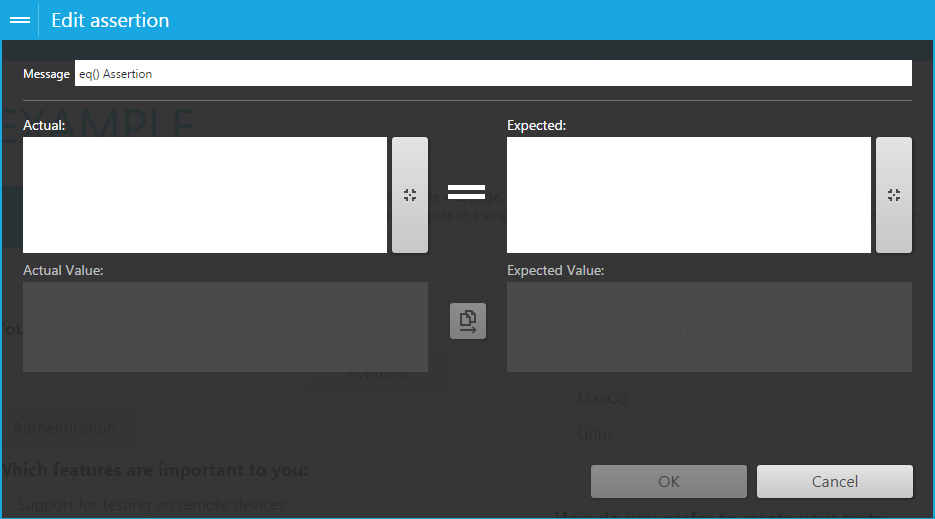
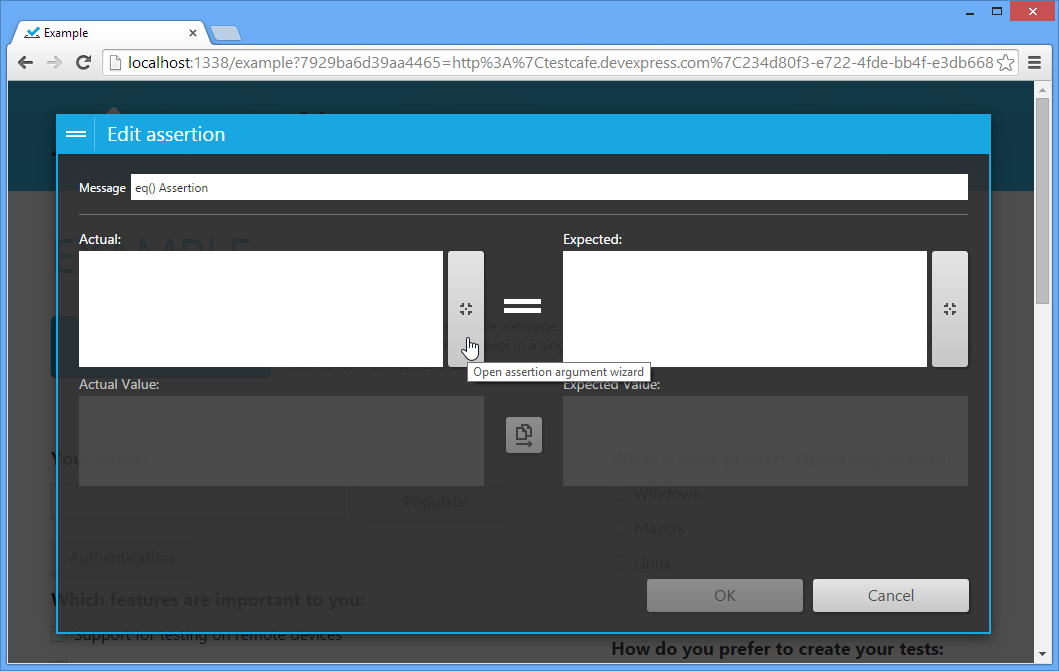
Click an expression field to open the editor that allows you to modify the expression manually. Alternatively, you can use the specific integrated wizard, which is opened using the button located on the right edge of each expression field. The wizard allows you to configure the expression visually step by step.
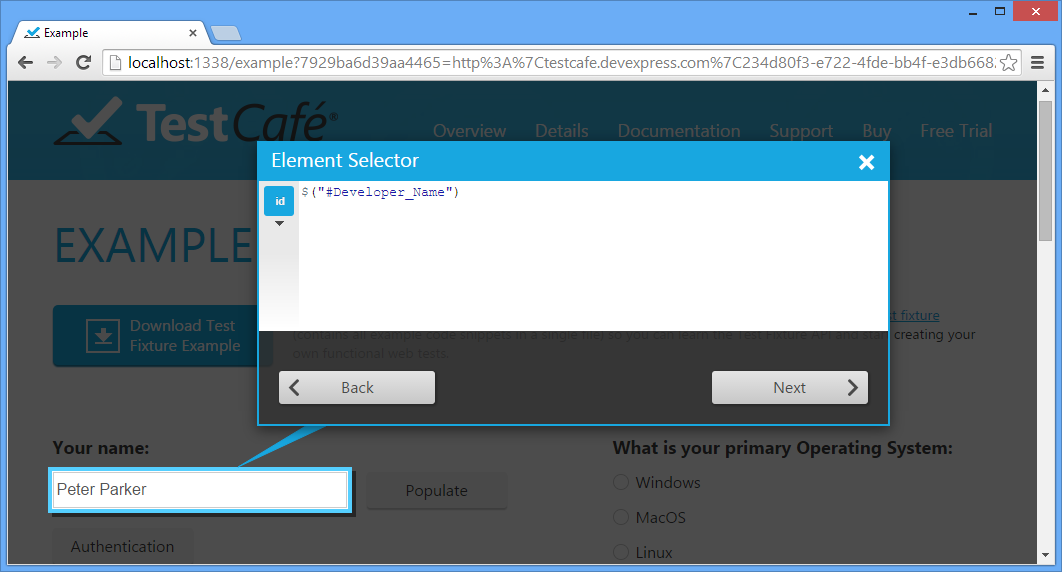
First, select an element on the web page and click it. Available elements become outlined with a blue line when hovered. Once you have clicked the required element, TestCafe opens a dialog window where you can modify the element selector expression for the element you just clicked. To continue, click Next.
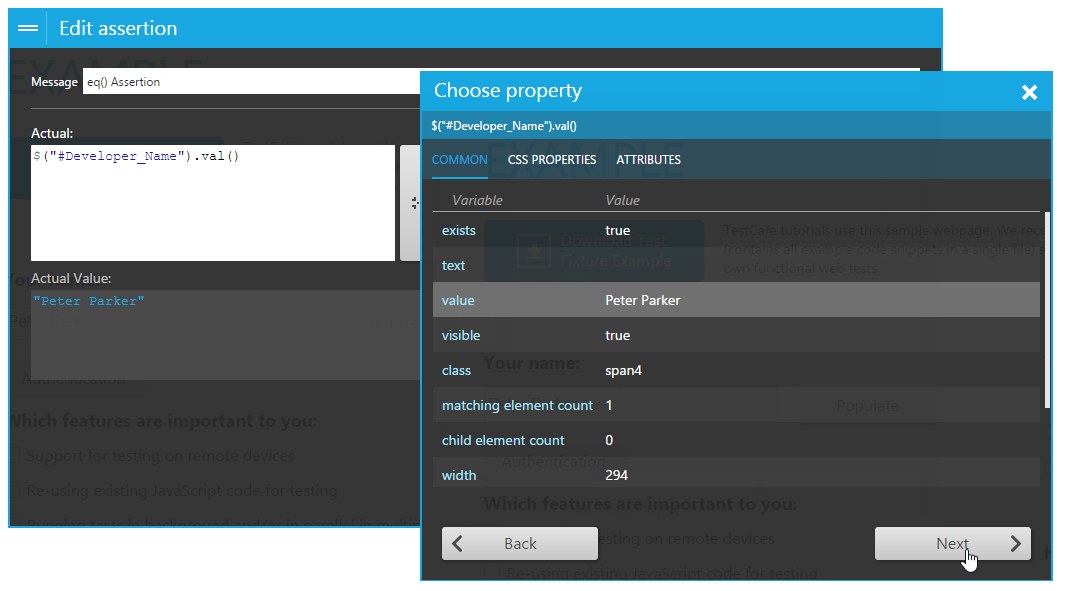
The opened Choose property dialog provides three tabs to choose common properties, CSS properties, or element attributes. Names of properties and attributes are displayed in the left column, while the right column shows their values. Select the required property or attribute, whose selector expression and value will be later shown within an expression and expression value fields correspondingly. Click Finish to close the wizard. If there is no appropriate property within the Choose Property dialog window, uncheck the selected item and click the Finish button to add the element's jQuery selector expression that you can later modify manually within the integrated expression editor.
You can see that an expression field now contains the element selector expression. The blackout field below illustrates the expression value.
Note that for the eq and notEq assertions, there is a specific button at the right edge of the actual expression value field. It allows you to copy the field's value to the corresponding field for the expected expression value.
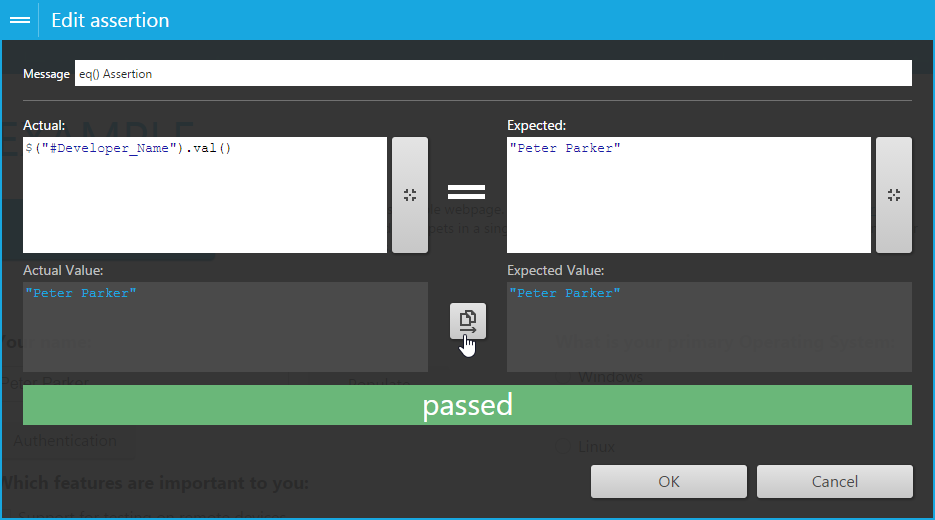
When all required fields are specified, TestCafe automatically shows whether the assertion has passed or failed. Click the OK button to save the assertion. You can see that created assertion has been added to the list of assertions. Repeat the actions mentioned above to add one or more assertions to the step.
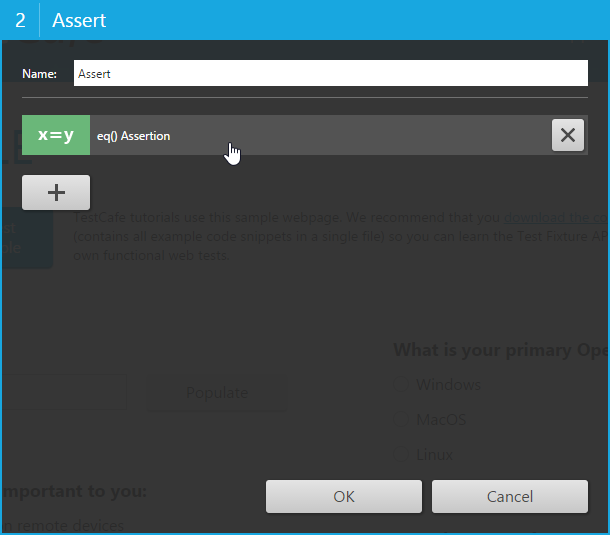
Click the OK button to close the assertions dialog and save the changes to the step.
Tip
See also the Assertions API section
Wait Action
To add a wait action, click the  button within the toolbar. The opened dialog allows you to specify the step name and the pause interval in milliseconds.
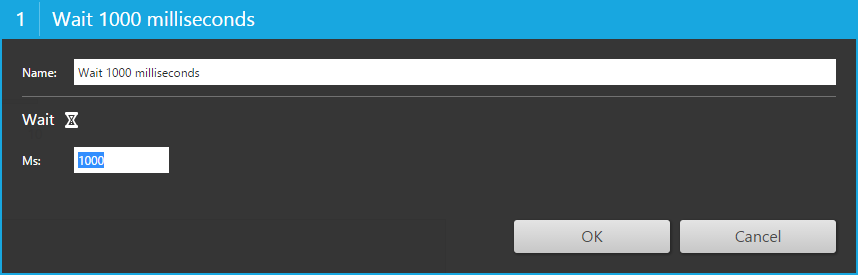
Click Add Action to save the step to the list of recorded steps.
Tip
See also the act.wait and act.waitFor user actions.
Automated Screenshots
TestCafe can take a screenshot of the tested page at any moment during test run. Use the Screenshot action to record a step at which TestCafe captures the webpage. The resulting screenshot is stored in the test report, which you can view in the Results tab.
To add the Screenshot action, use the  button.
Important notes
- The automated screenshot feature is not available on the Linux operating system.
- Screenshots cannot be taken when a test is running in a remote worker.
Tip
File Uploading
When you upload a file during the recording of a test, TestCafe automatically copies the file to the Upload folder that is located within the folder that contains the test file. The popup window in the top right corner of the screen informs you that the uploaded file has been successfully copied to a specific path, or that an error has occurred during file uploading (access is denied, local disk is out of space, etc.). If a file with the same name already exists, it will be rewritten. Successfully uploaded files will then be used during the test run.
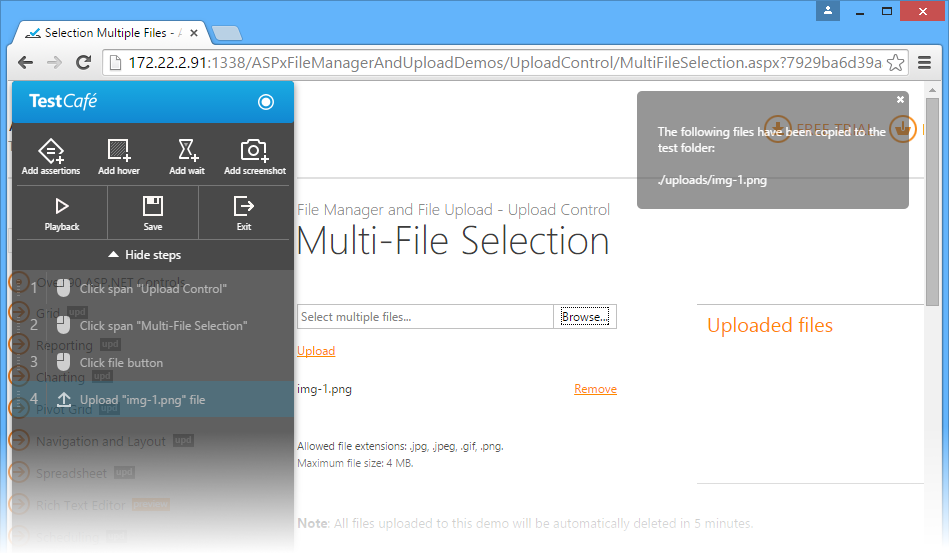
Note that you are not allowed to modify the name and the path of the uploaded file during the recording of a test. You can modify them later manually using code.
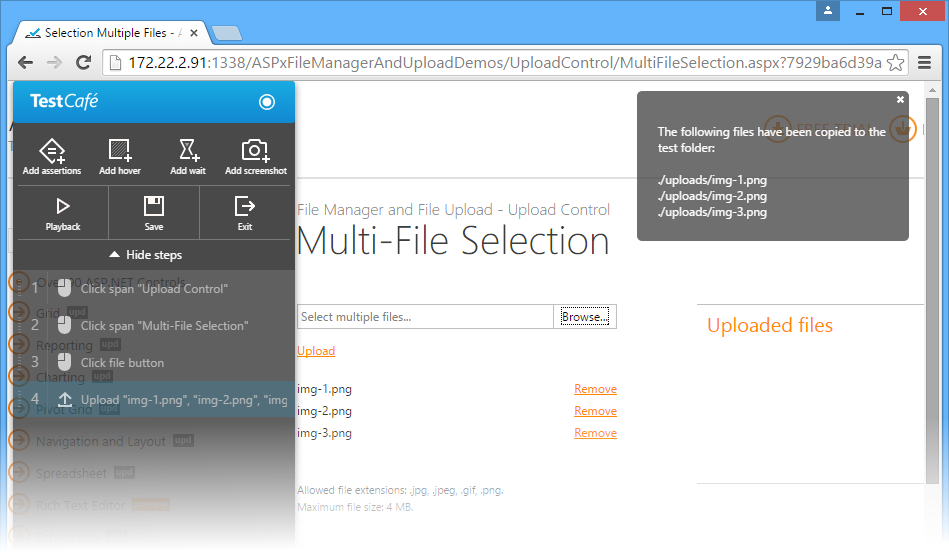
In case the tested webpage allows you to implement multi-file selection during uploading, TestCafe will record this action as a single step showing relative paths to all uploaded files within the popup window.
Tip
See also the act.upload user action.
Http Authentication
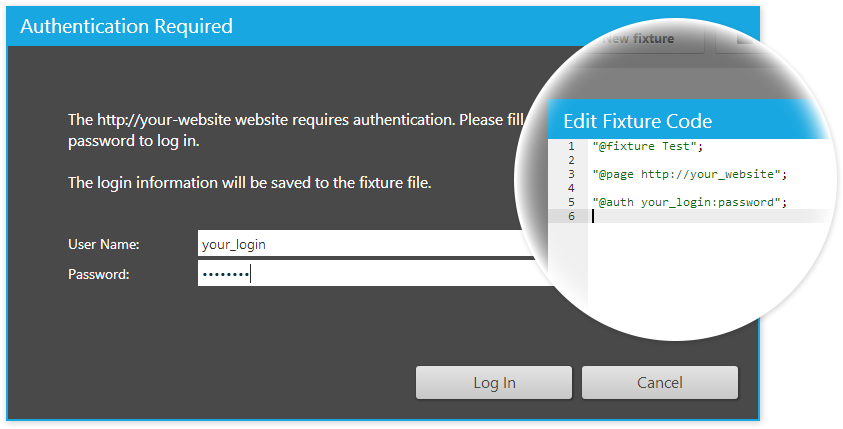
If the page requests Windows or Basic Http authentication, TestCafe intercepts this action and opens its own authentication form where you can enter user credentials. If the entered login and password are correct, TestCafe saves them to the fixture (*test.js) file within the @auth directive (see the Http Authentication topic).
Note that in case of Windows authentication, TestCafe additionally requires domain and workstation (PC) names. By default, these names are automatically received from the machine where TestCafe is installed.
If the entered credentials are invalid, TestCafe will ask you to re-enter the login and password.
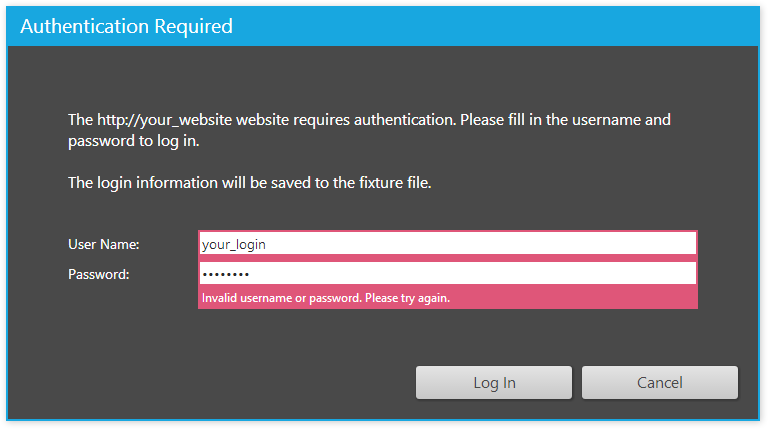
When the credentials are saved, the visual recorder continues the recording.
If the authentication is cancelled (using the Cancel button), TestCafe provides the following scenarios:
- If the authentication was invoked during the first step recording, TestCafe will return you to the Control Panel.
- If the authentication was invoked during the second step recording, TestCafe will delete the last recorded step and restart recording.
- If several steps were recorded before the authentication, TestCafe will show a corresponding message, delete the last recorded step, play back the steps and return you to the recording.
- If TestCafe detects incorrect test steps before the authentication, it will delete the last recorded step and redirect the recording to the initial test page, so that you can correct errors and replay the test.
Playback
During a test recording, you can play back a test by clicking the  button.
Once you click the button, TestCafe will play back all recorded steps in the order they were recorded for a specific web page within the same browser window.
If an error occurs within a test step, TestCafe considers this step to be critical, stops playback and opens a popup window that shows information about the error. To close the window, click Return to recording. TestCafe will mark the failed step with red and open the step's options dialog where you can fix the error.

If a non-critical error (for example, errors within assertions) has occurred at any step, TestCafe will stop the playback at the failed step, select the failed step in the list of recorded steps and show the dialog with the supposed error. Note that you can edit the step right within the dialog window and click the Replay Step button to playback this step once again. Click Skip step to continue the playback from the next step. If you skip the failed step without fixing it, then this step will be marked with red until you fix it or restart the playback.
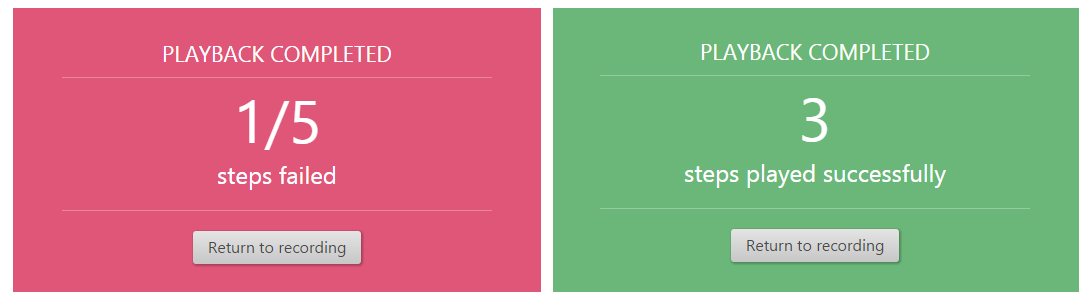
At the end, TestCafe will display a popup window illustrating how many steps failed and how many succeeded. Click Return to recording to continue.
Test Saving
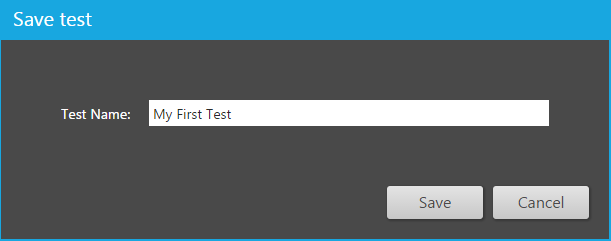
To save a test without leaving the recorder, click the  button. Within the opened dialog window, TestCafe will prompt you for a test name and then return to recording. Note that the button is not available if there are no unsaved changes in the test.
If you are going to stop test recording and then return to the Control Panel, click the  button. If the test has been saved, TestCafe will return you to the Control Panel without showing that dialog window.
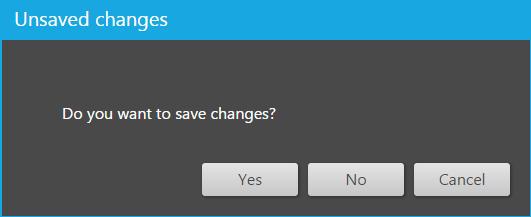
If the test wasn't saved, TestCafe will inform you that there are unsaved changes in the test and will then open a dialog window. Click Yes to save the test. If you have already named the test previously using the Save toolbar button, TestCafe will save the changes to the same test file. If the test is being saved for the first time, it will ask you to enter the test name. The No button allows you to leave the recorder without saving. The Cancel button returns you to the test recording.
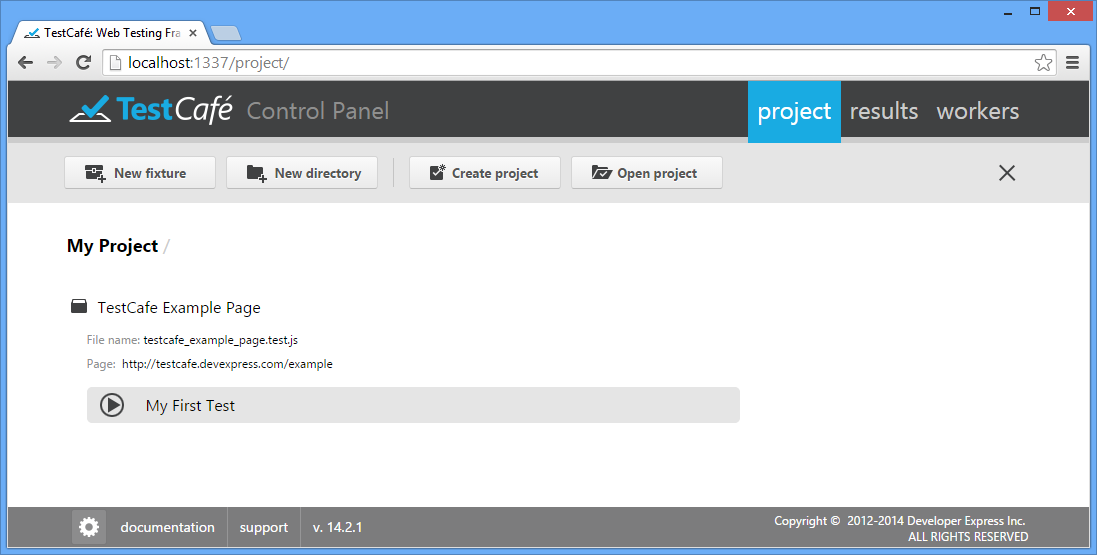
Once you save the test, it will appear in the Control Panel within the fixture.
Selector Expressions
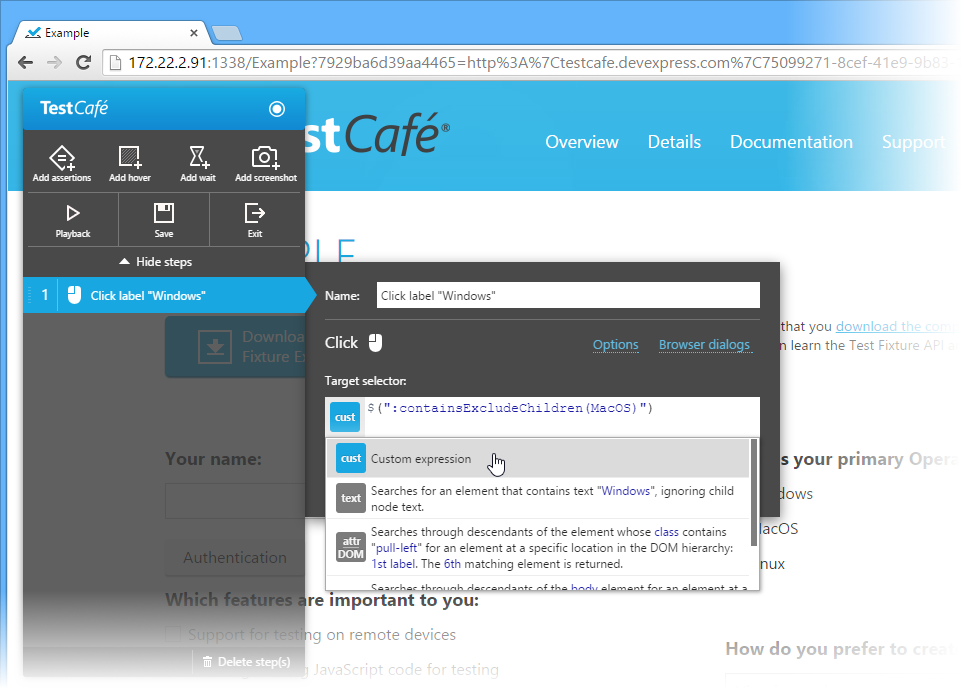
The target element selector is the essential action setting. It uniquely identifies and refers to the action target element within the page. To help you be more precise in selecting the target element, TestCafe offers a set of predefined selector expressions. The expressions are built as a combination of specifically designed patterns. You can identify which patterns are used for a selector by the icon it displays. Each selector also displays a textual description of the pattern logic to be applied. Click a selector icon to open a popup list of available selector expressions and choose one that suits your needs best.
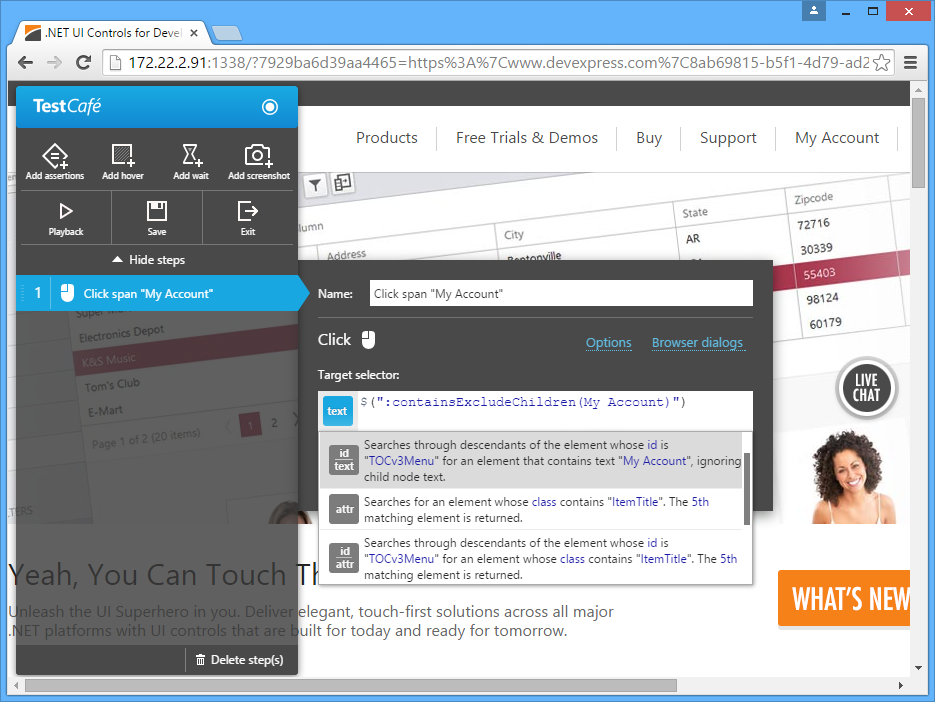
You are able to compose a custom selector expression as well.
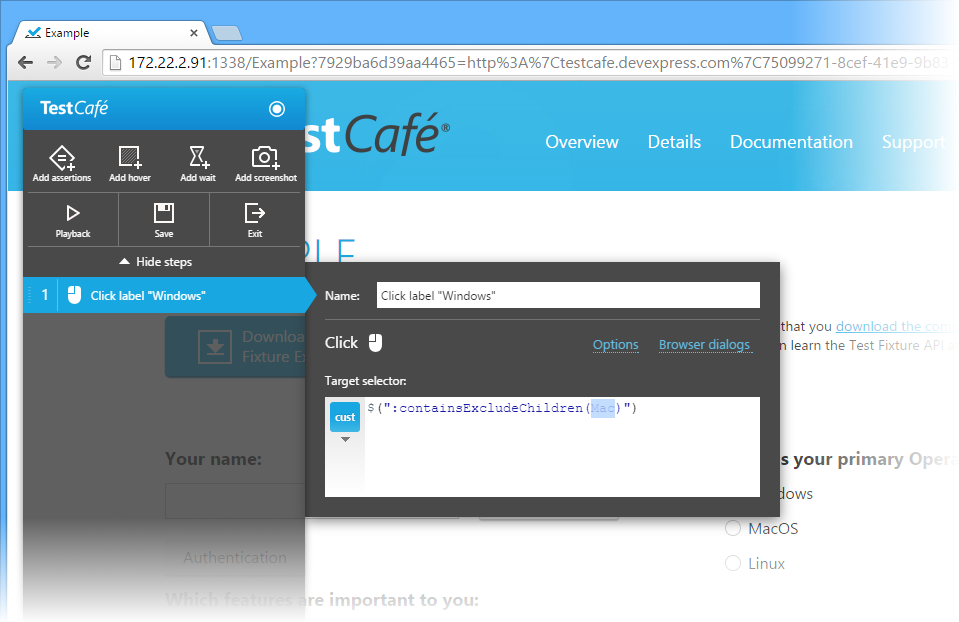
Once you have changed the default selector code, a new - custom - selector is added to the list of available selectors.
Shortcuts
Use the following shortcuts when recording tests.
- CTRL+R: Records a step containing one or more assertions
- CTRL+SPACE: Records a Hover action
- CTRL+Q: Records a Wait action
- CTRL+M: Records the Screenshot action
- CTRL+D: Playbacks the test step by step from the beginning
- CTRL+S: Saves the test
- CTRL+E: Ends recording
- CTRL+G: Completes an action; used when working with input fields to indicate that an action, such as typing, is completed